
4 posts tagged with "singularity"

View All Tags

ยท 4 min read
German P. Barletta

As we said in our last last singularity post, Singularity is now Apptainer.

We'll now redo our container locuaz.sif, but this time using Apptainer.

Installing Apptainer

First, we get some dependencies that are not usually in a linux desktop. On a ubuntu-based system we do:

apt install fuse2fs squashfuse fuse-overlayfs

Then we download Apptainer from the repo, and install it:

sudo dpkg -i apptainer_<version>_amd64.deb

Notice that for some reason the Singularity and Apptainer packages are incompatible, so you'll have to remove Singularity to install Apptainer. Yeah, the break-up wasn't amicable.

The definition file

This is the first piece of good news, the definition file stays the same!

Building the container

In this case, the apptainer command is just a drop-in replacement of singularity. So for locuaz we do:

sudo apptainer build locuaz.sif locuaz.def 

Signing and verifying your container

In our previous post we used sylabs endpoint to store our key so users could verify our signature. This time we'll choose the "open" way to do it.

The steps to generate your key are the same as before, just replace singularity with apptainer and follow the steps:

apptainer key newpair

After finishing the wizard to create your key, you can sign you image. This is how I signed locuaz:

apptainer sign locuaz.sif
INFO: Signature created and applied to image 'locuaz.sif'

Now, when you created your key, you got a fingerprint, if you missed it, just list your keys:

apptainer key list

Push the fingerprint to openpgp:

apptainer push <FINGERPRINT>

This'll work because keys.openpgp will be your default after installing apptainer. If you're not sure of this, list your remotes:

$ apptainer remote list
Cloud Services Endpoints
========================

NAME URI ACTIVE GLOBAL EXCLUSIVE INSECURE
DefaultRemote cloud.apptainer.org YES YES NO NO
SylabsCloud cloud.sylabs.io NO YES NO NO

Keyservers
==========

URI GLOBAL INSECURE ORDER
https://keys.openpgp.org YES NO 1*

* Active cloud services keyserver

Authenticated Logins
=================================

URI INSECURE
docker://ghcr.io NO

After pushing a new key you'll get an email to the account you set when you created the key with apptainer key newpair. It'll offer you to publicly link the email with the fingerprint, so users can look you up with the email instead of using the fingerprint:

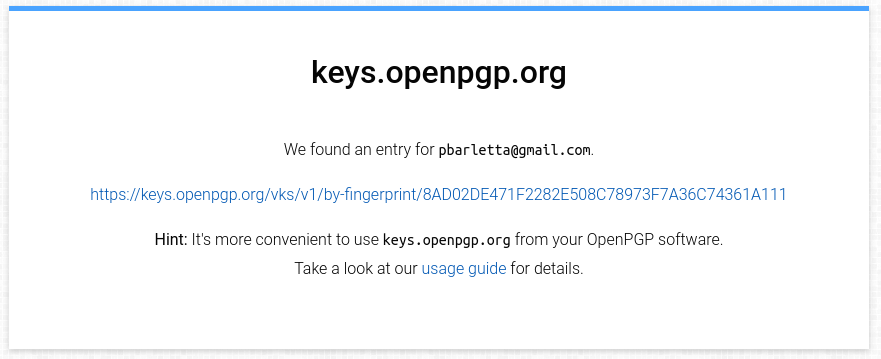
They could download the public key from there, but it's much easier to do it on the command line, supplying the openpgp url. For example, to verify locuaz.sif:

$ apptainer verify --url https://keys.openpgp.org locuaz.sif 
INFO: Verifying image with PGP key material
[LOCAL] Signing entity: Patricio Barletta <pbarletta@gmail.com>
[LOCAL] Fingerprint: 8AD02DE471F2282E508C78973F7A36C74361A111
Objects verified:
ID |GROUP |LINK |TYPE
------------------------------------------------
1 |1 |NONE |Def.FILE
2 |1 |NONE |JSON.Generic
3 |1 |NONE |JSON.Generic
4 |1 |NONE |FS
[REMOTE] Signing entity: Patricio Barletta <pbarletta@gmail.com>
[REMOTE] Fingerprint: 8AD02DE471F2282E508C78973F7A36C74361A111
Objects verified:
ID |GROUP |LINK |TYPE
------------------------------------------------
1 |1 |NONE |Def.FILE
2 |1 |NONE |JSON.Generic
3 |1 |NONE |JSON.Generic
4 |1 |NONE |FS
INFO: Verified signature(s) from image 'locuaz.sif'

Uploading to GitHub packages (ghcr)

Finally, we upload our container to a registry. GitHub Packages are available for everyone and chances are your code is on GitHub already and having everything put together in one place is nice.

We first get our Personal Access Token (PAT) from GitHub. GitHub docs were written for docker users, so our command lines will be a bit different. This is how I did it:

apptainer remote login --username pgbarletta docker://ghcr.io

And then pasted my token. Now you should be good to push your container:

apptainer push <APPTAINER-CONTAINER>.sif oras://ghcr.io/<NAMESPACE>/<APPTAINER-CONTAINER>.sif:<VERSION>

This is how it looked in my case:

apptainer push locuaz.sif oras://ghcr.io/pgbarletta/locuaz.sif:0.5.3

As of version 1.2.2 Apptainer shows no progress bar or anything like it, so if it looks like it hanged, just have faith.

And that's it! You can then go to your packages and link it to its corresponding repo. I'll post again if I find something better but for now this is my chosen protocol.

References

  1. https://github.com/settings/tokens
  2. https://docs.github.com/en/authentication/keeping-your-account-and-data-secure/managing-your-personal-access-tokens
  3. https://docs.github.com/en/packages/working-with-a-github-packages-registry/working-with-the-container-registry
  4. https://apptainer.org/docs/user/main/docker_and_oci.html#github-container-registry

ยท 2 min read
German P. Barletta

This is probably the last of a series of blog posts on singularity.

We know how to build a simple container with CUDA support and we know how to build a more complex one that also has conda support. We'll now sign our container (locuaz.sif) and upload it for others to download. Honestly, this is the easiest part of all and I'm only writing it down for future reference.

Intro (digression)

Before starting, we have to clarify something: Singularity is no more. In a weird turn of events, a company forked it and called it to Singularity CE, while the original project had to rename itself to Apptainer and is now under the umbrella of the Linux Software Foundation, which I guess protects it from stuff like this happening again, but, honestly, I have no idea.

As of now, an HPC cluster can be expected to have a singularity module but I haven't found one with apptainer built-in, so we'll stay with sylabs, at least for now.

The sylabs way

Creating a key to sign containers

In order to sign something you need a signature and Singularity's docs are straightforward in this regard, just do what they say

Creating a sylabs token to verify containers

You'll also want the ability to verify a signature. Creating an account on sylabs allows you to verify containers from others and upload yours. Sadly, they don't let you create an account, but force you to integrate their credentials with github, or gmail, etc.

Signing and uploading with sylabs

After all of that, it's just:

singularity sign locuaz.sif

and to verify the signature, users will do:

$ singularity verify locuaz.sif 
INFO: Verifying image with PGP key material
[LOCAL] Signing entity: Patricio Barletta <pbarletta@gmail.com>
Objects verified:
ID |GROUP |LINK |TYPE
------------------------------------------------
1 |1 |NONE |Def.FILE
2 |1 |NONE |JSON.Generic
3 |1 |NONE |JSON.Generic
4 |1 |NONE |FS
INFO: Verified signature(s) from image 'locuaz.sif'

Finally, push it to your sylabs library. In my case, that looks like:

singularity push locuaz.sif library://pgbarletta/remote-builds/locuaz-0.5.3

Sylabs will give you 11Gb of storage for free, so you'll be good for a couple of images. It'd be fun to try and see if an Apptainer image gets accepted, my guess is a big resounding ....

References

  1. https://docs.sylabs.io/guides/latest/user-guide/signNverify.html
  2. https://docs.github.com/en/packages/working-with-a-github-packages-registry/working-with-the-container-registry

ยท 4 min read
German P. Barletta

In the previous post we reviewed a simple Singularity definition file for a container that gave support for CUDA development.

We'll now see an example that uses the CUDA toolkit runtime and a conda environment, or more precisely, mambaforge which includes mamba as a conda replacement and conda-forge as the default channel.

mamba works almost identically to conda and it's an order of magnitude faster. I think many of us would've dropped conda as a package manager and virtual environment if it wasn't for mamba's solver.

Writing the definition file

This is the Singularity definition file I used to containerize the locuaz optimization protocol. We'll skip the details about locuaz, suffice to say that it's an antibody optimization protocol that carries a lot of dependencies, some of them cannot be installed through pip, others cannot be installed through conda so we end up using both, which is not ideal. This is precisely why I think trying to containerize it is a good challenge.

Let's check the .def definition file:

Bootstrap: docker
From: nvcr.io/nvidia/cuda:11.7.0-runtime-ubuntu22.04

%post
export LC_ALL=C
export DEBIAN_FRONTEND=noninteractive
apt update
apt install -y wget libopenmpi-dev
mkdir /opt/concept
cd /opt/concept
mv ../usr_deps.yaml ./
wget https://github.com/conda-forge/miniforge/releases/download/23.3.1-0/Mambaforge-23.3.1-0-Linux-x86_64.sh
bash Mambaforge-23.3.1-0-Linux-x86_64.sh -p /opt/mambaforge -b
. /opt/mambaforge/bin/activate
mamba env create -f usr_deps.yaml
conda activate concept
pip install locuaz --root-user-action=ignore

%runscript
locuaz

%environment
export LC_ALL=C
source /opt/mambaforge/bin/activate /opt/mambaforge/envs/concept

%files
usr_deps.yaml opt/

Some explanations about the non-obvious lines:

  1. We install wget to download the mambaforge installer script and libopenmpi-dev since locuaz uses MPI to launch multiple GROMACS MD runs.
  2. We run the mambaforge installer with the -b flag to skip the license agreement question and -p to specify the install dir.
  3. . /opt/mambaforge/bin/activate to activate conda and then use the mamba executable to build the environment. The yaml file was included with the container.
  4. And after creating and activating the environment, we install locuaz with a flag that was added to pip for the specific case of containerized builds, where we usually are the root user: --root-user-action=ignore, to silence the pip warning coming from installing with root privileges

Now, the major pain point when including mambaforge is the activation of the environment.

You can't run source /root/.bashrc after installing mambaforge since source is note available during the execution of %post. You can't run conda init or mamba init either, since it'll ask you to restart your shell.

The solution is to run the activation script in a way any UNIX system should support, that is, using the syntax: . script. Then on %environment we get a full bash interpreter and we can source the activation script and point it to the folder where our environment resides: source /opt/mambaforge/bin/activate /opt/mambaforge/envs/<your_environment>.

Finally, we build it:

sudo singularity build locuaz.sif locuaz.def

Actually running it

There's another obstacle when running from a container, and this is the binding of host directories. Singularity includes some host dirs by default, but if your containerized workflow needs additional access, you'll need to include it with the --bind flag.

In our case, it's GROMACS that needs many additional locations. This is how the singularity call command ends up looking looks on my machine:

singularity exec --nv --bind /usr/local/gromacs,/lib/x86_64-linux-gnu,/usr/local/cuda-12.2/lib64,/etc/alternatives locuaz.sif locuaz daux/config_ligand.yaml 

Notice the --nv flag to be able to run with GPU support and how we include a plethora of comma separated directories, after the --bind flag. After locuaz.sif, our actual container, we call the locuaz program with a configuration file as argument.

The /usr/local/gromacs directory is where the GROMACS installations resides. The rest of the directories are the locations of the libraries that the gmx binary links to. These will be specific to each machine, but you'll easily find them by checking which libraries does the gmx binary link to.

For example, on my machine:

ldd `which gmx`
linux-vdso.so.1 (0x00007ffc8817a000)
libgromacs.so.8 => /usr/local/gromacs/lib/libgromacs.so.8 (0x00007f74c0200000)
libstdc++.so.6 => /lib/x86_64-linux-gnu/libstdc++.so.6 (0x00007f74bfe00000)
libgcc_s.so.1 => /lib/x86_64-linux-gnu/libgcc_s.so.1 (0x00007f74c5417000)
libc.so.6 => /lib/x86_64-linux-gnu/libc.so.6 (0x00007f74bfa00000)
libcufft.so.11 => /usr/local/cuda-12.2/lib64/libcufft.so.11 (0x00007f74b4c00000)
libopenblas.so.0 => /lib/x86_64-linux-gnu/libopenblas.so.0 (0x00007f74b27b0000)
libm.so.6 => /lib/x86_64-linux-gnu/libm.so.6 (0x00007f74c532e000)
libgomp.so.1 => /lib/x86_64-linux-gnu/libgomp.so.1 (0x00007f74c52da000)
libmuparser.so.2 => /usr/local/gromacs/lib/libmuparser.so.2 (0x00007f74c017d000)
/lib64/ld-linux-x86-64.so.2 (0x00007f74c5471000)
libdl.so.2 => /lib/x86_64-linux-gnu/libdl.so.2 (0x00007f74c52d5000)
libpthread.so.0 => /lib/x86_64-linux-gnu/libpthread.so.0 (0x00007f74c52d0000)
librt.so.1 => /lib/x86_64-linux-gnu/librt.so.1 (0x00007f74c0178000)
libgfortran.so.5 => /lib/x86_64-linux-gnu/libgfortran.so.5 (0x00007f74b2400000)

If you wish to make the run line shorter, you can store these locations on the dedicated environment variable $SINGULARITY_BIND:

export SINGULARITY_BIND="/usr/local/gromacs,/lib/x86_64-linux-gnu,/usr/local/cuda-12.2/lib64,/etc/alternatives/"

And then just run:

singularity exec --nv locuaz.sif locuaz daux/config_ligand.yaml

This does make everything a bit uglier for the user and I'd argue that creating a conda environment and running pip is not that much harder, but hey, some people love containers.

Hopefully in the future I'll get to benchmark the containerized version of the protocol, but I don't expect significative slowdowns.

ยท 2 min read
German P. Barletta

Here's a simple starting file that's based on a CUDA 11 docker image for ubuntu 22.04. It includes the vectorAdd.cu file from cuda-samples/Samples/0_Introduction/vectorAdd and some header files from cuda-samples/Common. These sample files used to come with the CUDA toolkit, but now they have to be downloaded from a repo.

Bootstrap: docker
From: nvcr.io/nvidia/cuda:11.7.0-devel-ubuntu22.04

%post
export DEBIAN_FRONTEND=noninteractive
apt update
cd /opt
nvcc -ccbin g++ -m64 -gencode arch=compute_50,code=sm_50 -gencode arch=compute_52,code=sm_52 -gencode arch=compute_60,code=sm_60 -gencode arch=compute_61,code=sm_61 -gencode arch=compute_70,code=sm_70 -gencode arch=compute_75,code=sm_75 -gencode arch=compute_80,code=sm_80 -gencode arch=compute_86,code=sm_86 vectorAdd.cu -o local_vectorAdd -I./

%runscript
/opt/local_vectorAdd

%environment
export LC_ALL=C

%files
helper_cuda.h /opt/
helper_string.h /opt/
vectorAdd.cu /opt/

Some explanations about the non-obvious lines:

  1. export DEBIAN_FRONTEND=noninteractive is an almost mandatory line in all containers. It prevents the system from expecting user input, which in our case would hald the container build.
  2. export LC_ALL=C: so Perl doesn't complain about localization if we launch the container as a shell.
  3. We're asking nvcc to generate PTX and SASS for all currently supported architectures.

After saving this into the definition file singu.def and building it on my machine:

$ sudo singularity build singu.sif singu.def

I uploaded it onto Leonardo, which is a Red Hat 8.6 system, and ran it:

(base) [pbarlett@lrdn3433 ~]$ singularity run --nv singu.sif 
INFO: Converting SIF file to temporary sandbox...
WARNING: underlay of /etc/localtime required more than 50 (76) bind mounts
WARNING: underlay of /usr/bin/nvidia-smi required more than 50 (387) bind mounts
[Vector addition of 50000 elements]
Copy input data from the host memory to the CUDA device
CUDA kernel launch with 196 blocks of 256 threads
Copy output data from the CUDA device to the host memory
Test PASSED
Done
INFO: Cleaning up image...

GLIBC versions between my computer (2.35) and Leonardo's (2.28) also differ, so we can only hope we don't run into any issues later on.